Today I’m going to share how you can convert your website design prototypes in Sketch, Figma or Adobe XD into a fully functional and responsive WordPress website in the most easy and time saving way possible.
No matter what tool you choose for designing your websites (Sketch, Figma or Adobe XD), you can follow the instructions given in this post to convert your designs to WordPress.
2 Different Methods of Prototype to WordPress Conversion
When it comes to conversion of designs to WordPress, there are just two ways you can do it:
- Create custom WordPress Theme – You can start from scratch and create a custom WordPress theme. In this you convert your design prototypes to HTML and then convert those into a WordPress theme. You can also start directly by building your custom WordPress theme using something like Underscore.
- Use a Theme and Page Builder – The second way is, you can build your WordPress site using a powerful base theme like Astra or Divi and a page builder like Beaver Builder or Elementor.
The first method is extremely tedious and you must know how to code in PHP and WordPress in order to convert your designs this way. It’s also more time consuming. But there’s a benefit to this method and that is, you have more control over the quality of code you produce and if you follow the WordPress coding standards you can keep the theme very clean and light weight.
In this post we’re not going to covering that custom theme method and instead we’ll be covering the page builder method.
If you want to learn how to do it using the custom theme, there are pretty of good tutorials present online like this and this. Both of them are very comprehensive and you’ll find them very useful.
Design Prototype to WordPress Conversion Process
Let’s look into the process of how you can convert your design prototypes in Figma, Sketch or Adobe XD into WordPress website. It’s important to understand that we talk about conversion of designs to WordPress, we’re not talking about directly converting them using some magical tool.
We’re instead talking about using the designs as reference for our development and keeping the designs next to WordPress to build the website looking at the design files.
The process is quite simple and can be summed up in 6 simple steps:
- Pick a powerful, base WordPress theme
- Pick a page builder plugin
- Setup global theme settings like layout, typography, colors etc in Customizer/Theme Options
- Setup global settings in page builder
- Build the header and footer using theme options or using page builder.
- Build homepage and then rest of the pages
Let’s look at each of these in more detail below.
1. Pick a Powerful, Base WordPress Theme
The first and most important step is to choose a suitable theme for your project. You’ll find thousands of themes in the market, but we don’t need to go out for a search to find theme that matches our designs.
Instead we’re picking a theme that provides us with a lot of options and settings to build a solid website base, but does not have any design of it’s own. Basically a bare bones framework theme that is is flexible enough to be used with a page builder to build any kind of website.
There are a lot of such page builder compatible themes in the market like:
These are just few of the most popular ones, but you can find lot more on the internet by doing a search search. At our agency we personally use Astra theme as it comes with a lot of great features and is extremely light weight and flexible. The Astra Pro plugin gives even more power to the theme and you can use it to build pretty much any kind of website you want using a complementing page builder (discussed below).
Please note that, you might have a website project going on right now, but this probably won’t be the last website you’ll build. So while picking a theme make sure to pick one that you’re fully comfortable with and which is flexible enough that you can use it across all your future WordPress projects as well.
2. Pick a Page Builder
Similar to picking a base theme that’s powerful enough to let you build any kind of WordPress site, it’s important to pick a page builder that you can use across all your WordPress projects. Here are some of them that we like:
These are also some of the most popular page builders in the market. You don’t need to look further away from these and can choose one of them. Just try the free versions for these plugins and pick one that you like the best.
At our agency we use Beaver Builder for most of the sites we build because we’ve found it to be least bloated compared to the other two, light weight and extremely flexible.
Pro Tip: Each theme and page builder has it’s own learning curve so our advise would be to choose a combination of theme and page builder stick to it. That way you’ll save time from unnecessarily jumping between themes and page builders which will in turn help you increase your overall efficiency and development speed.
At Fantastech we use Astra theme and Beaver Builder plugin combination for most of out client sites and have even built this particular site using the combination. So we’d definitely recommend this combination to you for your websites as well.
3. Setup Global Theme Settings
A WordPress theme is what is responsible for the global look and feel of any WordPress website. Most page builder framework themes (like the ones shared in the list above) provide you with the full range of settings to setup the website’s global page layout, font sizes, font family, colors, header & footer layouts and pretty much every other global setting you can think of.
With a powerful theme you can pretty much build the entire global page layout, header and footer for most of the websites. We use Astra with Astra Pro at our agency and it gives us a powerful set of options and features that allows us to setup the global styling of the website really fast.
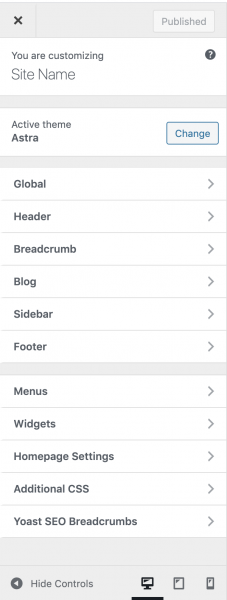
These global setting are usually present in Customizer under Appearance in WordPress backend. But some themes like Divi create their own Theme Options page in the backend for doing these global settings.
Now an important thing to note here is these themes come with hundreds of very small settings that you can use to setup your website in any way you want, so it becomes important to learn the theme settings inside-out in order to best utilize all it’s capabilities.
So when you pick a theme make sure to spend at least a few hours to go through the documentation of the theme to know exactly what global settings you can get inside it. Some themes provide more control and others provide less control, so you need to think of this when choosing your theme so that you can move through this particular step more swiftly.
4. Setup Global Settings in the Page Builder
Like themes, page builders also have global settings in which you can set global values for the row and column paddings, margins, font sizes, max width and so on. Again, page builders also come with a ton of such settings and it’s important to learn the page builder of you choice fully, to make the most out of it.

5. Build the Site Header and Footer
Depending upon how complex or easy your designs are, you can build your headers and footers from right inside the theme Customizer settings (or Theme Options). Most themes provide you powerful settings for creating and styling the headers and footer and also manage their responsiveness on mobile and tablet.
If you have simple header with just logo on left and a menu on right, you can set it up by doing simple settings in the theme and creating a menu in the backend.
Similarly if you have a basic footer with a bunch of widgets and a simple footer bar, that’s also fairly easy to build in your theme using widgets and footer related theme settings.
Now there are two issues you might face with this:
1. You finish building the header and footer around 90%, only to realize the customizer does all required settings to finish it fully
It’s possible that when you’re building the header and footer, you’re 90% close to finishing it, but suddenly realize that the customizer does not have a few specific settings that you need to complete it.
In such cases, you might have do some custom CSS or create some custom HTML. These should not be an issue if you know basic HTML or CSS. But if you do not know how to write even basic HTML or CSS, now’s the good time to start learning.
2. The header and footer are too complex to be made using theme customer settings
The other issue you might face is that the designs contain complex header and footer that can’t be made using just the basic settings provided by the theme.
But there’s a solution for this. In most page builders you can build custom rows and sections and save them to be used else where. This opens up a whole lot of new possibilities of what you can build.
So you can build the complex header and footer in page builder itself, save it and then use the row/section globally on the site. In Astra Pro this can be done using Custom Layouts. In other theme there are other names to use the custom structure built in page builder globally on the site.
6. Build Homepage and then Rest of the Pages
So far, you’ve set the website’s global layout, setup the typography and colors and also built the header and footer, now it is time to build the content part for each part of the page, starting with homepage.
Now I don’t need to explain this step to you in detail because if you’ve used any page builder in past, you know how it goes. You start with editing the page in page builder, add rows, columns and modules and build different parts of the page.
In our experience we’ve found that a lot of times after we start building the homepage, we have to go back to steps 3 to 5 as we might miss setting up something global earlier. But it’s good in a way because when we complete building the homepage, we can be sure that everything is now complete in terms of global setup and we start with the internal pages.
The steps up to building homepage is what takes the most amount of time. But once the homepage is ready it becomes very easy to build rest of the pages and you can finish building all internal pages in no time.
So there you go!
This is probably the easiest and most efficient method to convert Figma, Sketch or Adobe XD designs to WordPress.
Does this still look a bit overwhelming?
If this looks a bit overwhelming to you, or you do not have the time to learn a new theme and page builder, that’s totally fine. You can still get your design prototypes converted to WordPress by hiring someone to do it for you.
At Fantastech, we provide conversion of Figma, Sketch and Adobe XD to WordPress as done for you services at very affordable pricing and can help you if you like.
If you’d like someone with experience and expertise to do it for you, do check us out.
And also do share with us what do you think about this method in the comment section below. We’d love to hear back from you.
[FREE eBook Download]
7-Point Checklist for Outsourcing Design to Code Projects Profitably & Painlessly
Outsource your design conversion projects to your development partners, the right way and get exceptional quality website code delivered on-time and within your budget WITHOUT going through the pain of inaccurate conversions, countless revisions and missed deadlines.